Set Up with Google Sheets
This guide walks you through setting up a Telar exhibition using Google Sheets to manage your content. Interactive tools on this page generate your configuration file automatically.
You’ll set up three things: a GitHub repository for your site, a Google Sheets spreadsheet for your content, and a configuration file to connect them. You’ll enter a few details as you go — your GitHub username, your spreadsheet link, a title for your site. At the end of this page, you’ll download a ready-to-use configuration file.
You will need:
- A GitHub account (free)
- A Google account for Google Sheets (free)
Already familiar with GitHub Pages and YAML? You can configure everything manually with the Manual Setup guide.
The setup might feel like a lot of steps, but you only have to do it once. After that, everything happens in your Google Sheets spreadsheet.
Create Your Repository
A repository is your project’s home on GitHub — it holds your configuration and image files.
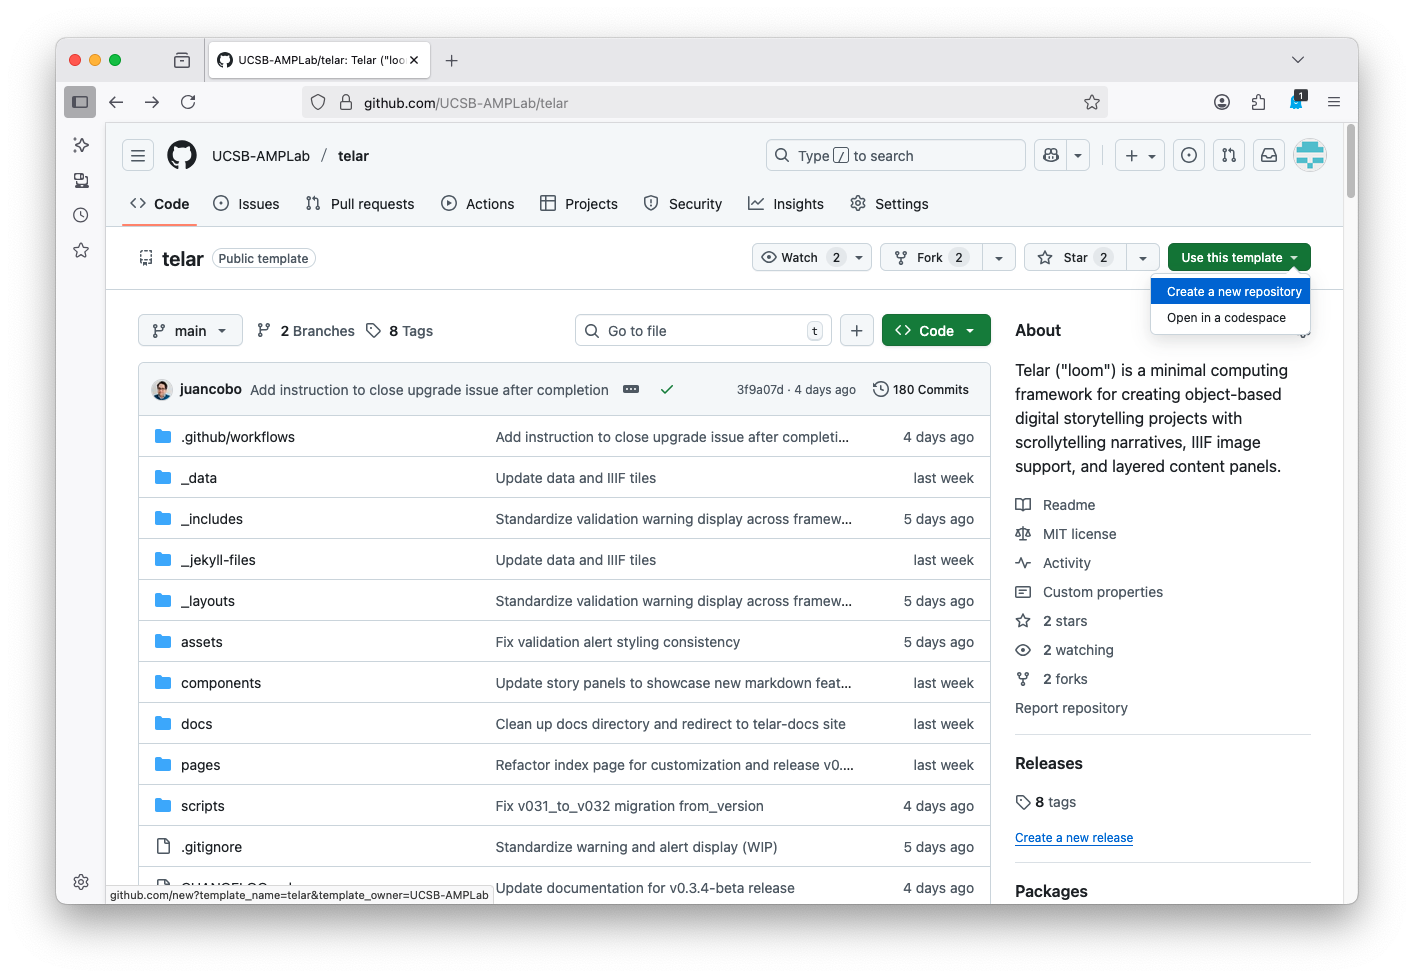
- Visit the Telar template
- Click the green Use this template button
- Choose Create a new repository
- Give your repository a name — use lowercase letters and hyphens (e.g.,
my-exhibition) — this will be part of your site’s web address - Make sure Public is selected
- Click Create repository
Keep your repository public. Private repositories will not work with GitHub Pages unless you have a paid GitHub plan.
Enter your GitHub details below. These are used to build your site’s web address and to generate your configuration file at the end.
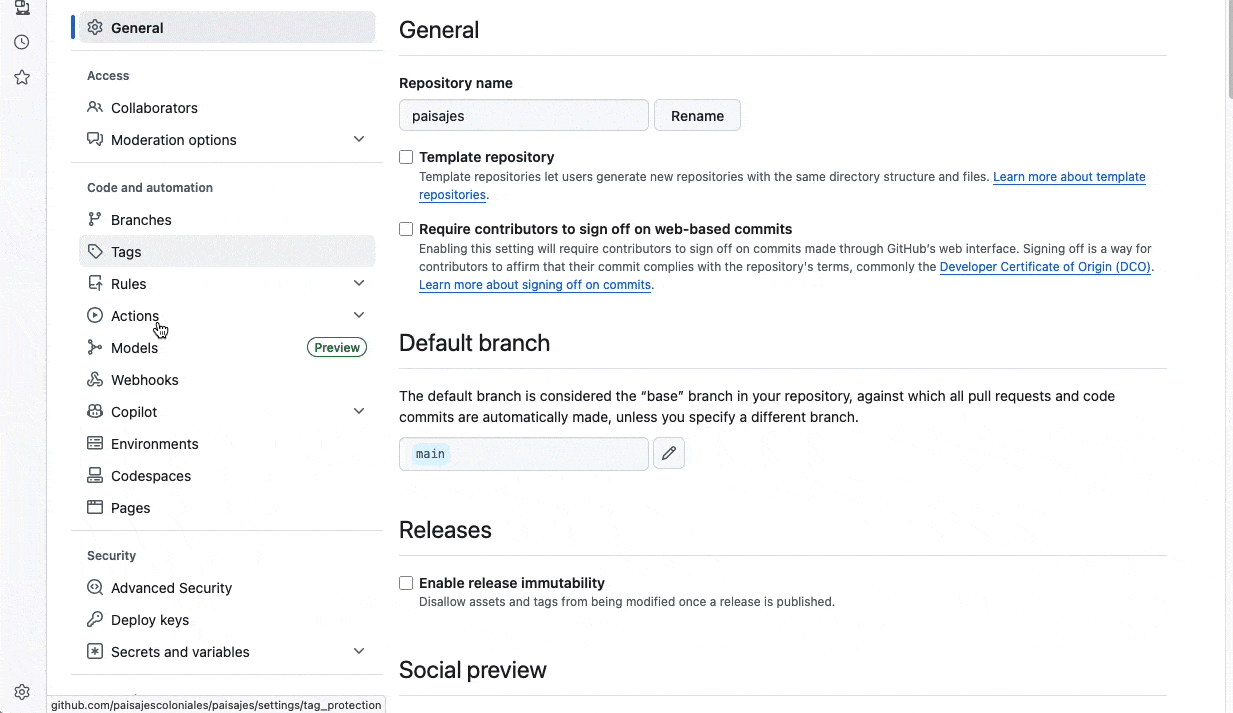
Enable GitHub Pages
GitHub Pages turns your repository into a live website for free.
- In your repository, go to Settings → Pages
- Under Source, select GitHub Actions
- Click Save
Duplicate the Google Sheets Template
Your Google Sheets spreadsheet is where you manage all your content — objects, stories, and text.
- Go to https://bit.ly/telar-template
- Click File → Make a copy
- Save to your Google Drive with a name you will remember (e.g., “My Telar Exhibition”)
Publish Your Sheet
Your spreadsheet needs to be published so Telar can read your content during builds.
- Go to File → Share → Publish to web
- Click Publish
- Copy the published URL and paste it below
Generate Your Configuration
Fill in the remaining details and this page will create your configuration file.
Your _config.yml
Once generated:
- In your GitHub repository, navigate to
_config.ymland click the pencil icon to edit - Select all the existing content and replace it with what you copied or downloaded
- Click Commit changes to save
Verify Your Setup
After committing, GitHub Actions will automatically build and publish your site. This takes 2–5 minutes.
- Click the Actions tab to watch the build progress
- When it finishes, visit your site at the URL shown in the preview above
- You should see a Telar site with your title and the default demo content
Build problems? Check that your Google Sheets published URL is correct — it should come from File → Share → Publish to web. If your site does not appear at all, check the Actions tab for error details. You can also paste your
_config.ymlinto the Telar Config Validator to check for errors.
Next Steps
Your Telar site is up and running. Follow this tutorial to learn how Telar stories work and add your own content, or jump ahead to any section:
- Plan Your Narrative — Understand how stories, steps, and panels fit together
- Add Your Content — Upload images, fill in your spreadsheet, and create your first story
- Review and Refine — Set image coordinates, review your site, and polish