Add Your Content
Your site is set up. Now it’s time to add your images, videos, and audio files and build your stories. How you enter your content depends on which setup method you chose — but the structure is the same regardless.
Add Your Media
Objects in Telar can be images, videos, or audio files. Telar supports two ways to include them:
Option A: Upload your own images
- In your GitHub repository, navigate to
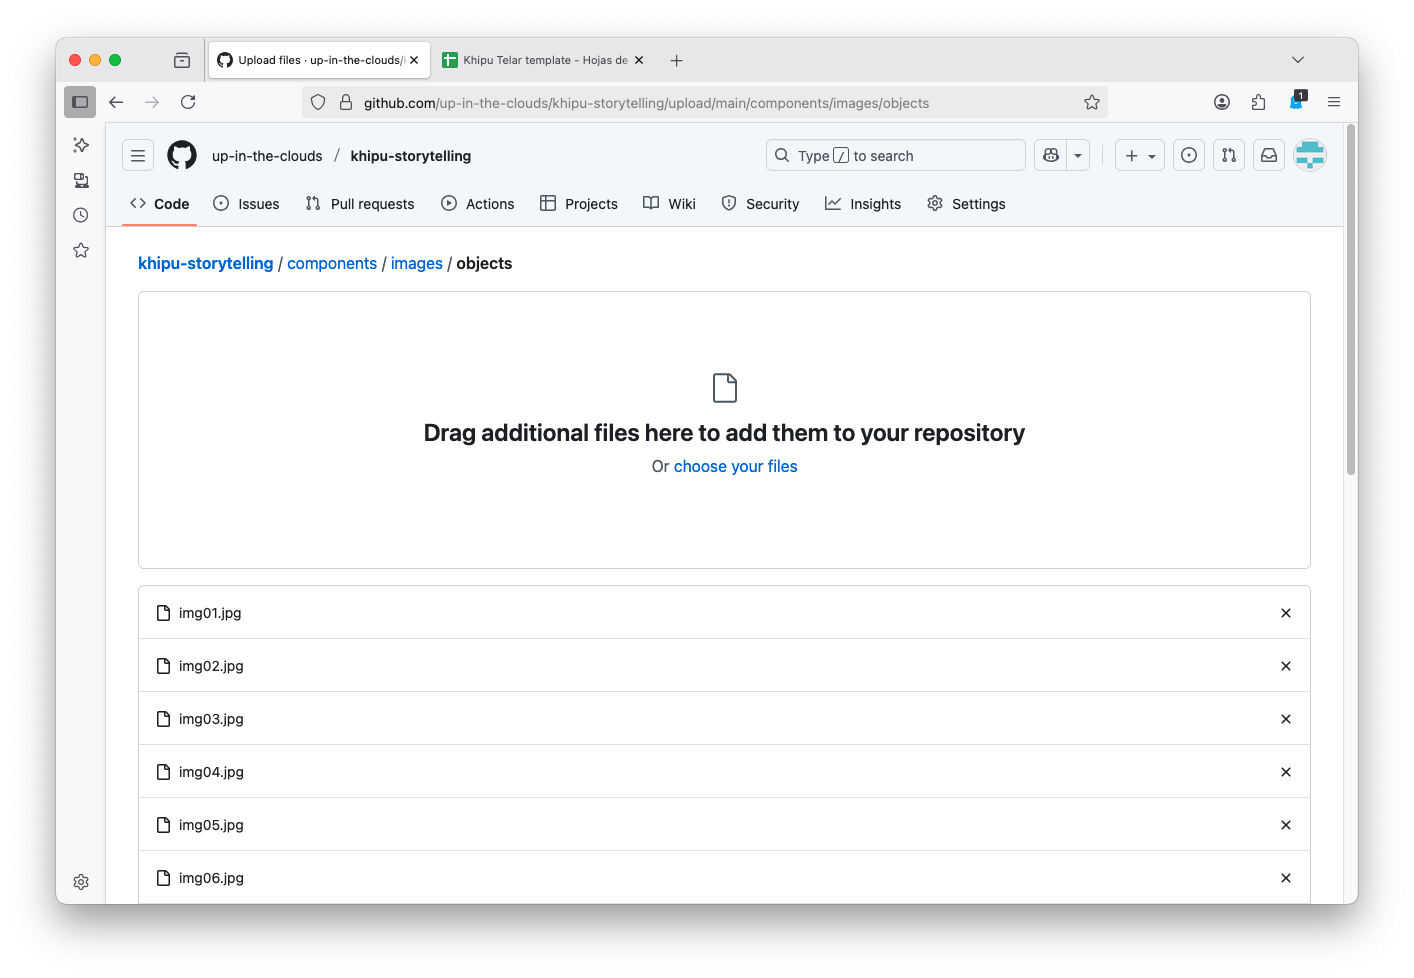
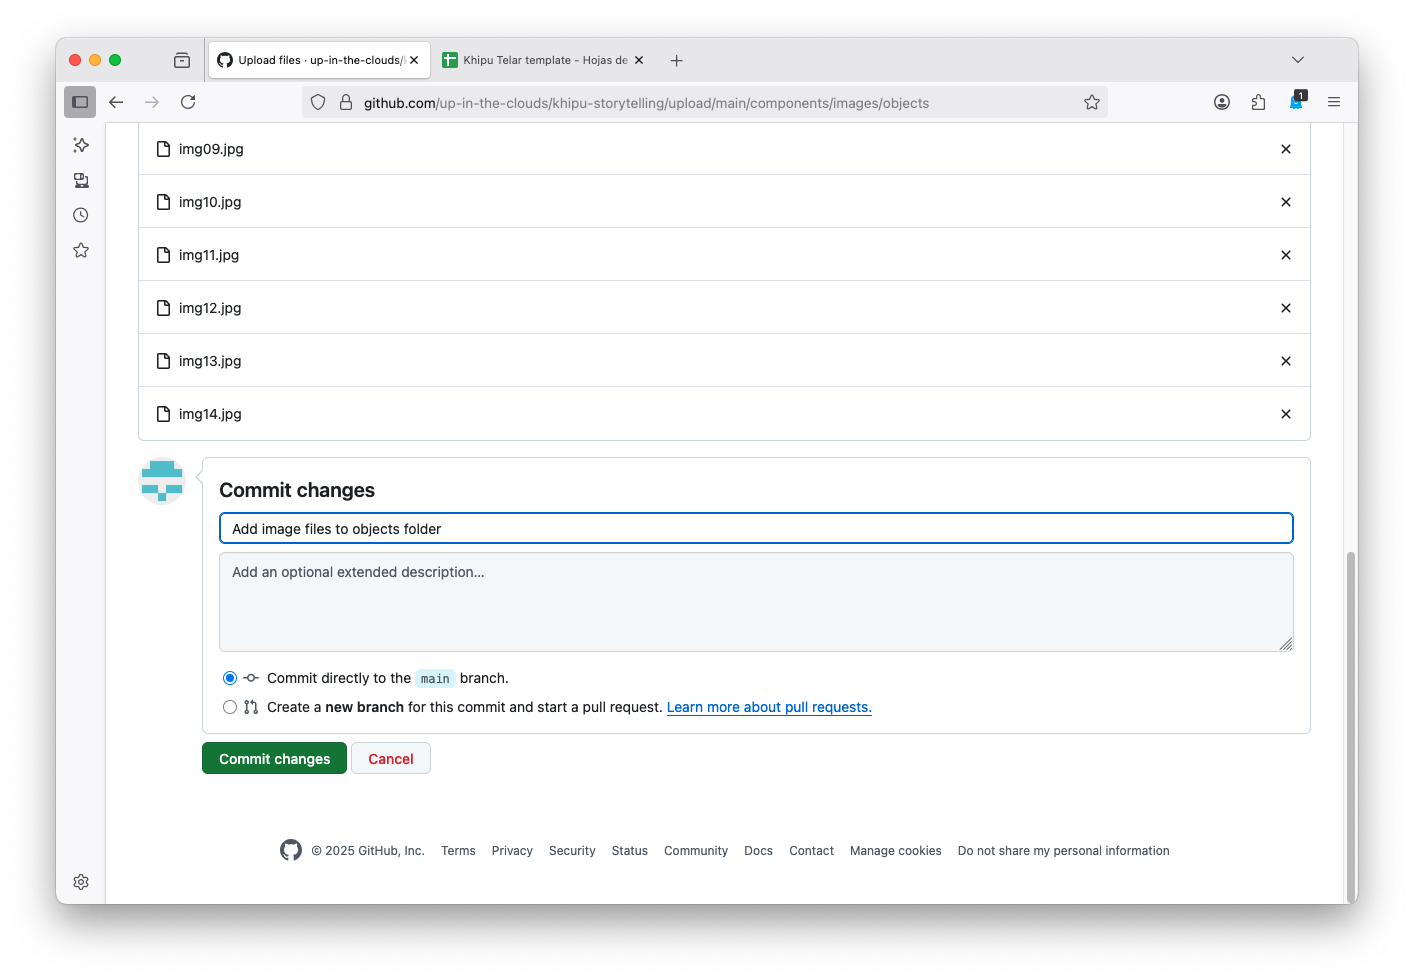
telar-content/objects/ - Click Add file → Upload files
- Drag your images into the upload area
- Give each file a simple name without spaces (e.g.,
textile-001.jpg,map-lima.jpg) - Click Commit changes to save
The filename (without the extension) becomes the object’s object_id — you will use this in your spreadsheet.
File Size Limits Individual images: up to 100 MB. Total repository: keep under 1 GB.
Option B: Use IIIF images from museums and libraries
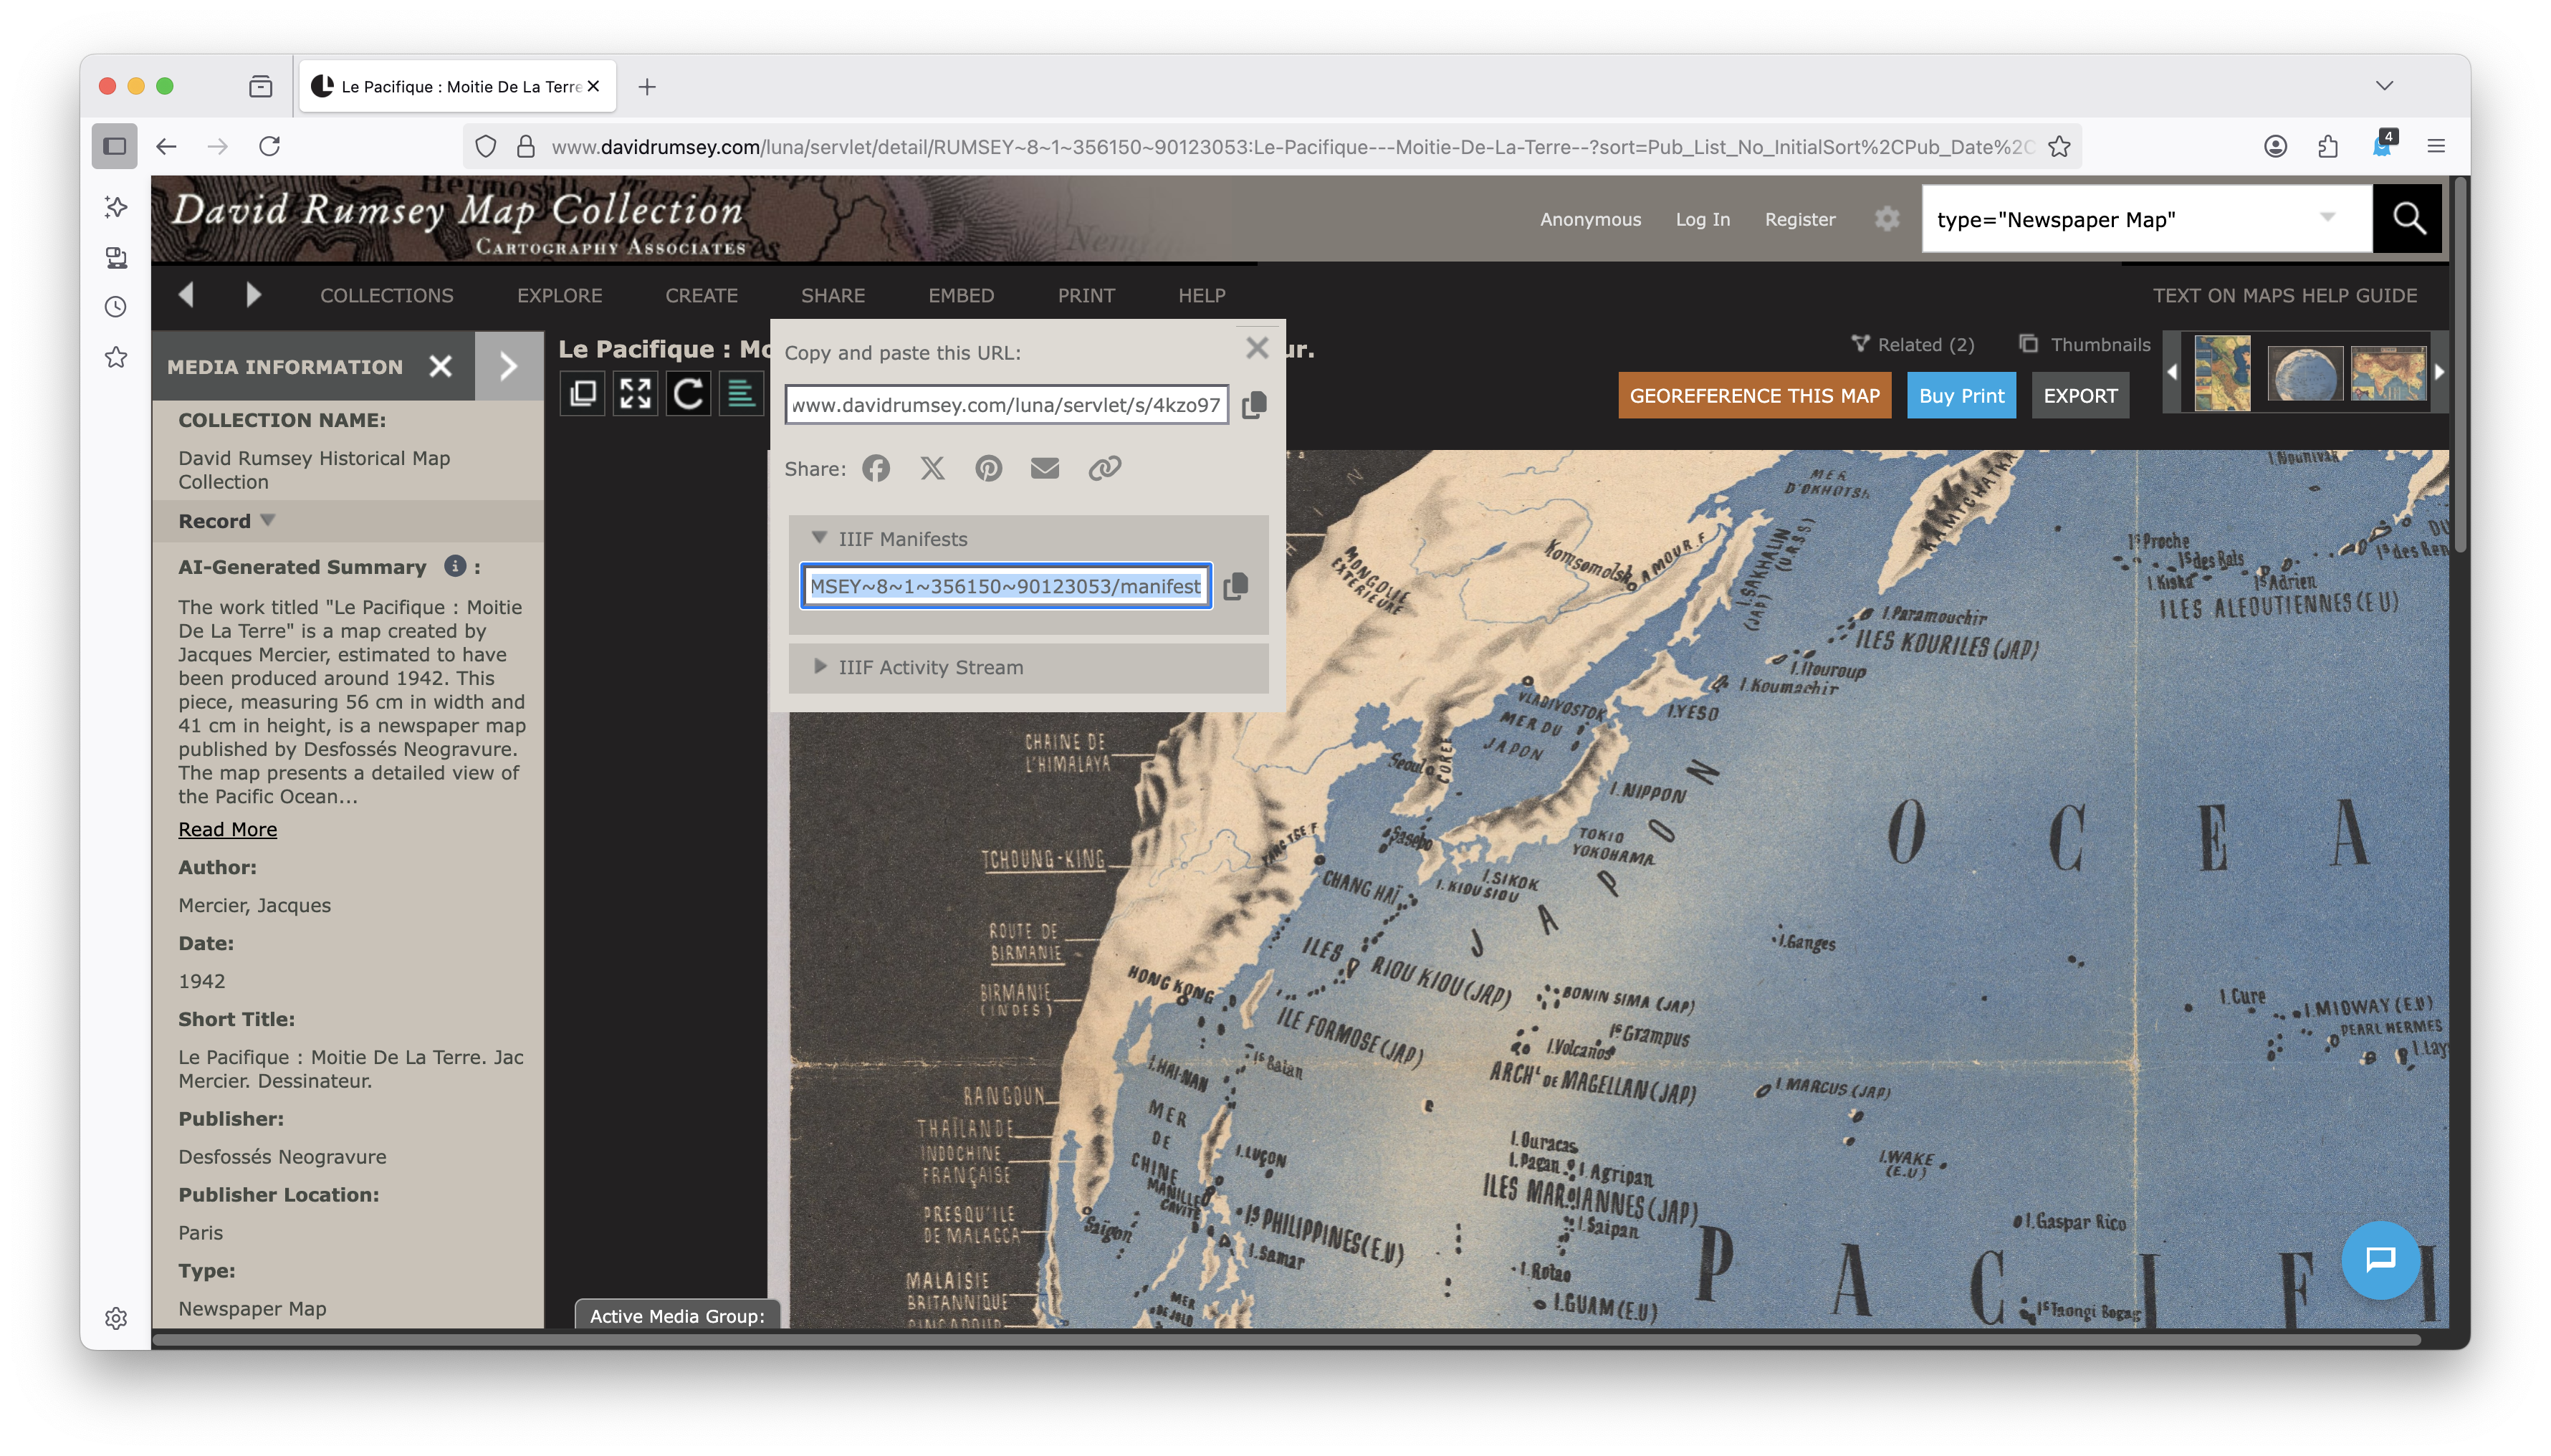
Many institutions provide high-resolution images through the IIIF standard. You can use these directly without downloading anything.
- Find IIIF resources from institutions like the Library of Congress, the British Library, or the Smithsonian (IIIF Guide to Finding Resources)
- Copy the manifest URL (e.g.,
https://example.org/iiif/manifest.json) - In your spreadsheet’s objects tab, add a row and paste the URL into the
source_urlcolumn
Register Your Objects
Once your files are in the repository, register them as objects so Telar knows about them. Each object needs:
object_id— a simple identifier (matches the filename for uploaded images, or any name for IIIF images)title— the display namedescription— a brief description (optional, but helps with search)source_url— the IIIF manifest URL (leave blank for uploaded images)creator,year,object_type,subjects— metadata for gallery filtering (all optional)
Where you enter this depends on your setup method:
- Compositor — add objects in the Objects tab
- Google Sheets — add rows in the objects tab of your spreadsheet
- CSV — add rows to
objects.csv
Ignoring Rows and Columns Prefix any row or column header with
#to have Telar skip it. Useful for notes and TODOs.
Structure Your Story
Each story is a sequence of steps. Whether you’re adding rows in a spreadsheet, editing a CSV, or using the Compositor’s visual editor, each step needs:
| Column | What it does |
|---|---|
step |
Step number (1, 2, 3…) |
object |
Which object to show (the object_id from the objects tab) |
x, y, zoom |
Where to look in the image — use 0.5, 0.5, 1.0 as a starting point |
clip |
Start and end times for video/audio clips (e.g., 00:30-01:15) |
question |
The heading for this step (e.g., “What is this textile?”) |
answer |
A brief 1-2 sentence response |
This is enough to create a working story. Each step shows an image (or plays a video/audio clip) with a question and answer that guide the viewer through your narrative.
Add Detail Panels
For steps where you want to share more than a brief answer, add content to the panel columns:
| Column | What it does |
|---|---|
layer1_content |
“Learn more” panel — extra detail about this step |
layer2_content |
“Go deeper” panel — even more depth |
layer1_button |
Custom button text (leave blank for “Learn more”) |
layer2_button |
Custom button text (leave blank for “Go deeper”) |
Write your panel text directly in the cell. You can use basic markdown formatting: **bold**, *italic*, and headings with ##.
Keep It Simple For most stories, the question-and-answer columns plus one layer of detail panels is plenty. You can always add more depth later.
Register Your Stories
In your project data, list each story with its title and subtitle.
Build Your Site
After making changes to your content:
- Compositor — export and push your updated site to GitHub
- Google Sheets — go to your repository’s Actions tab, click Build and Deploy, then Run workflow
- Local development — build locally with Jekyll, then push to GitHub
Wait 2–5 minutes for GitHub Pages to publish the new version.