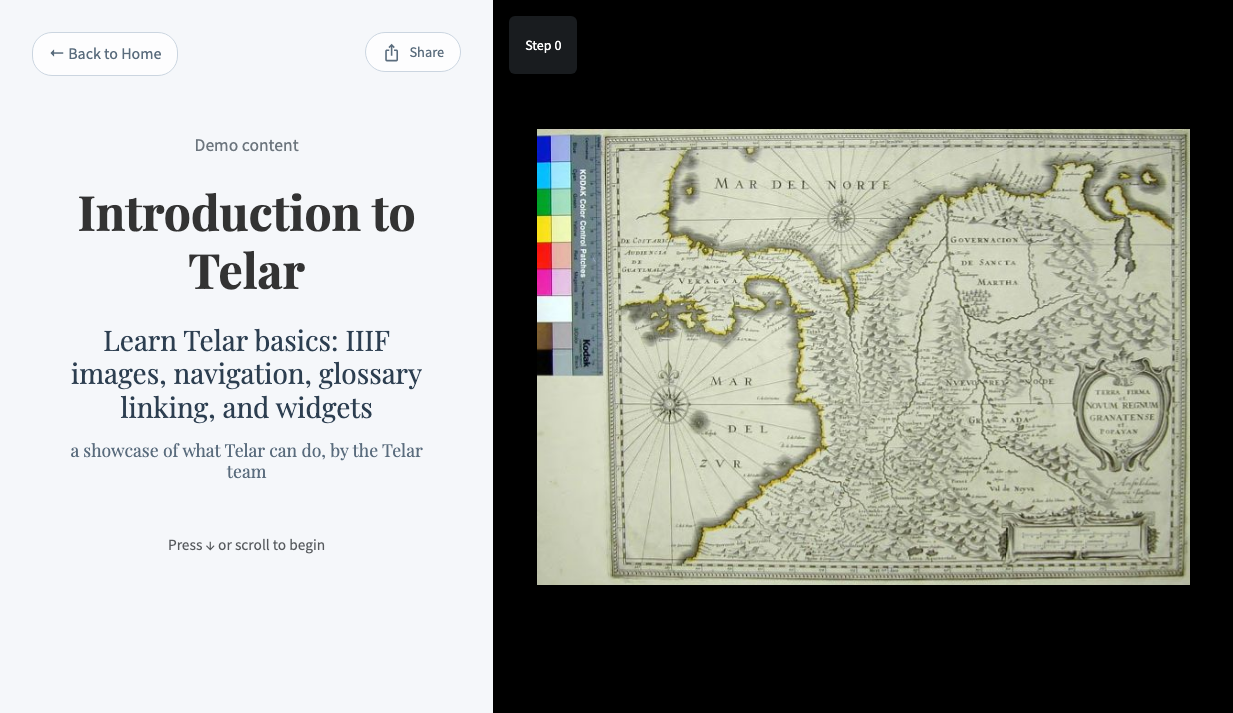
Stories & Panels
Stories are scrollable, step-by-step narratives built around your objects. Each step zooms into a specific region of an image and presents a question-and-answer pair with expandable detail panels.
How Stories Work
A story guides viewers through a sequence of steps. Each step:
- Zooms the IIIF viewer to a specific region of an object (using x, y, and zoom coordinates)
- Displays a question and a brief answer in the story panel
- Optionally offers up to three layers of additional detail via expandable buttons
Viewers scroll through steps, and the image viewer animates to match each new position. The result is a guided, visual narrative — a “scrollytelling” experience.
Registering Stories
Before building a story’s steps, register it in project.csv:
order,story_id,title,subtitle,byline
1,colonial-textiles,Colonial Textiles,Weaving traditions of the Americas,by Dr. Jane Smith
The story_id determines the filename for the story CSV and its URL. With story_id: colonial-textiles, Telar looks for components/structures/colonial-textiles.csv and serves the story at /stories/colonial-textiles/.
If you omit story_id, Telar uses story-{order} (e.g., story-1.csv for order 1).
See the CSV Reference: Project for all project.csv columns.
Building Story Steps
Each story has its own CSV file in components/structures/. The file defines steps in sequence:
step,object,x,y,zoom,question,answer,layer1_content
1,textile-001,0.5,0.3,0.8,What is this textile?,A colonial fragment showing complex weaving patterns,This fragment dates to the mid-17th century...
2,textile-001,0.2,0.7,0.4,What does this pattern mean?,An interlocking warp design used in ceremonial cloths,The pattern has been identified as...
3,map-lima,0.5,0.5,1.0,Where were these textiles found?,In the historic center of Lima,Archaeological excavations in the 1990s...
Required Fields
Every step needs:
step— Sequential number (1, 2, 3…) with no gapsobject— Anobject_idfrom your objects.csvx,y,zoom— Viewer coordinates (see below)question— The heading displayed in the panelanswer— A brief answer shown below the question
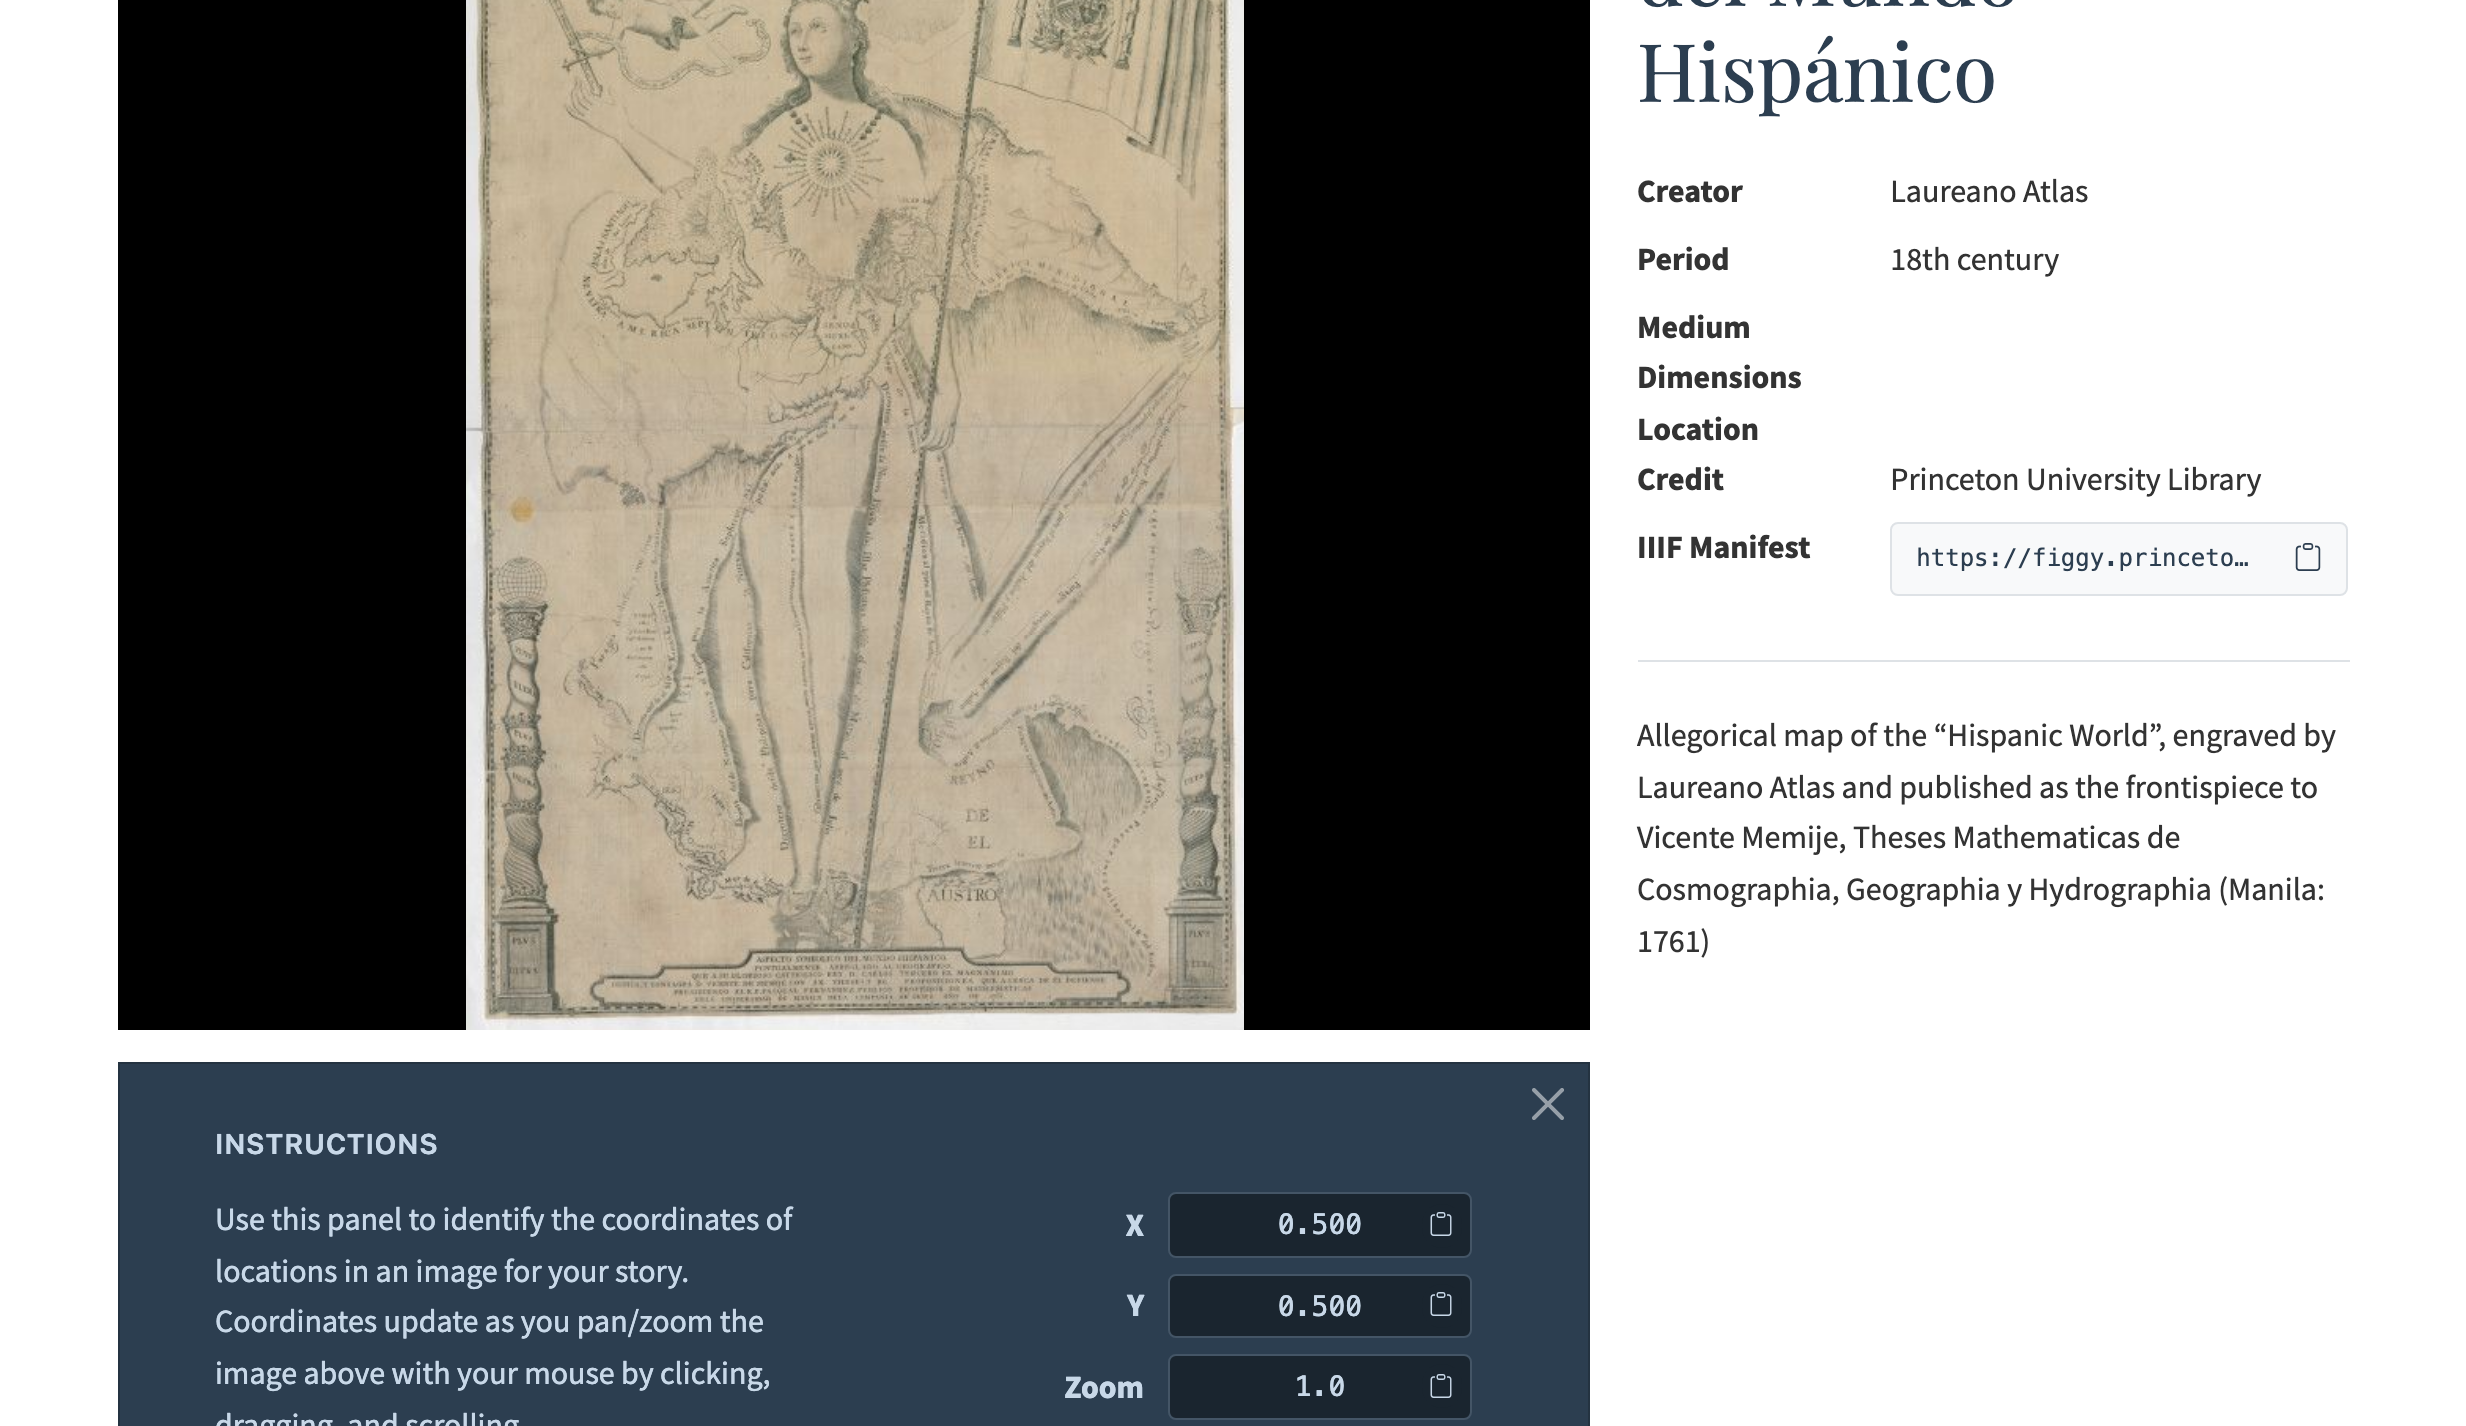
Coordinates
Coordinates tell the viewer where to focus for each step. All values are normalized from 0 to 1:
- x — Horizontal position. 0 = left edge, 0.5 = center, 1 = right edge
- y — Vertical position. 0 = top edge, 0.5 = center, 1 = bottom edge
- zoom — Zoom level. 0 = zoomed out (full image visible), 1 = maximum zoom
To find coordinates, use the coordinate picker on any object page: zoom and pan to the region you want, then click the Copy buttons to copy the x, y, and zoom values directly into your spreadsheet.
Panel Layers
Each step can have up to three layers of detail, revealed by buttons in the story panel:
| Layer | Default button text | Purpose |
|---|---|---|
| Layer 1 | “Learn more” | Primary detail |
| Layer 2 | “Go deeper” | Extended analysis |
| Layer 3 | (default) | Deepest level |
For each layer, you can customize two things:
- Button text (
layer1_button) — Leave empty for the default, or provide custom text like “See the technique” or “Read the source” - Content (
layer1_content) — The panel content itself
If a layer has no content, its button is hidden automatically.
Writing Panel Content
You can provide panel content in three ways. Choose based on complexity:
Method 1: Enter Text Directly
Type your text directly in the spreadsheet cell. Best for short panels (1–2 paragraphs).
layer1_content
"This fragment shows **advanced weaving techniques** from the colonial period."
You can use basic formatting: **bold**, *italic*, [link text](url), and glossary links ([[term-id]]).
For line breaks within a cell:
- Google Sheets: Press
Ctrl+Enter(Windows/Linux) orOption+Enter(macOS) - CSV files: Use actual newlines inside quoted text
- Alternative: Use HTML
<br>tags
Method 2: Paste Markdown Text
Paste text written in a plain text editor. This supports the full range of markdown features including headings, widgets (accordion, carousel, tabs), images with size controls, and a custom panel title using YAML frontmatter.
If you copy and paste from Microsoft Word, Google Docs, or similar applications, formatting will not be preserved. Write in markdown syntax instead — see the Markdown Syntax Guide.
Method 3: Reference a Markdown File
Point to a markdown file in your repository. Best for complex panels — especially those with widgets or content you want to reuse across steps.
layer1_content
colonial-textiles/step1-layer1.md
Save markdown files in components/texts/stories/. In your spreadsheet, enter just the filename — or if you’ve organized files into subfolders, include the subfolder name.
How Telar decides: If what you enter ends in .md and the file exists, it loads the file. Otherwise, it treats the value as content.
Choosing the Right Method
| Scenario | Recommended method |
|---|---|
| Short explanation (1–2 paragraphs) | Method 1: Enter directly |
| Panel with custom title or widgets | Method 2: Paste, or Method 3: File reference |
| Content with widgets (accordion, tabs, carousel) | Method 3: File reference |
| Same content used in multiple places | Method 3: File reference |
| Quick edits without leaving the spreadsheet | Method 1 or 2 |
Story Markdown Files
When using Method 3 (file references), your story markdown files live in components/texts/stories/:
components/texts/stories/
├── colonial-textiles/
│   ├── step1-layer1.md
│   ├── step1-layer2.md
│   ├── step2-layer1.md
│   └── step2-layer2.md
└── trade-routes/
    ├── step1-layer1.md
    └── step1-layer2.md
Organizing files into subfolders by story keeps things manageable as your site grows.
Panel Title
Add a custom panel title using YAML frontmatter:
---
title: "Weaving Techniques"
---

The interlocking warp pattern visible here indicates a complex
weaving technique that was common in the colonial period.
If you omit the frontmatter, the panel has no title — the content starts immediately.
What You Can Use in Panels
Story panels support:
- Standard markdown (headings, bold, italic, links, lists, images)
- Widgets (carousel, tabs, accordion)
- Glossary auto-links (
[[term-id]]) - Images with size controls (see Markdown Syntax Guide)
Controlling Story Display
Hiding Stories from the Homepage
If you want objects on the homepage but prefer stories to be accessed through navigation or direct links:
story_interface:
  show_on_homepage: false
Stories remain accessible at their URLs — only the homepage cards are hidden.
Hiding Step Indicators
The “Step 1”, “Step 2” indicators in the top-left corner of the story viewer can be hidden for a cleaner experience:
story_interface:
  show_story_steps: false
Users can still navigate through steps normally.
See Also
- CSV Reference: Stories — Complete column reference for story CSVs
- Objects — Defining the objects used in stories
- Widgets — Carousel, tabs, and accordion in story panels
- Private Stories — Restricting access to stories
- Configuration — Story interface settings